Process payments for QuickBooks Point of Sale Virtually
Process payments for QuickBooks Point of Sale Virtually
Process payments for QuickBooks Point of Sale virtually. Access your virtual terminal within your QuickBooks Merchant account and continue to make sales at QuickBooks Point of Sale. Process payments for credit cards.
This document will guide you in disconnecting your QuickBooks POS Payments merchant account and how to process payments when making a sale using a virtual terminal.
Disconnect QuickBooks POS Payments
To disconnect your QuickBooks POS merchant account follow these steps within the program.
Be sure to sign in as POS Sysadmin.
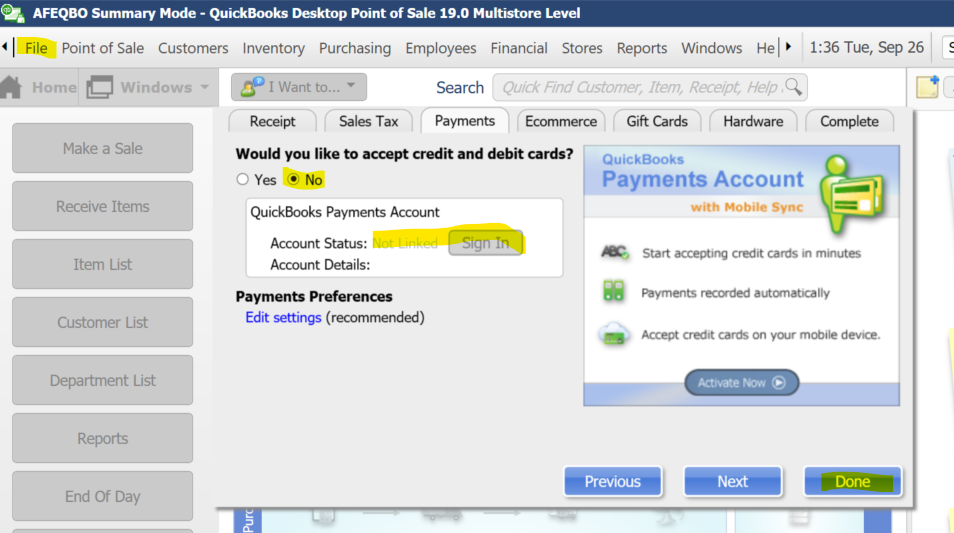
- On the POS server: Go to File – Setup Interview – Payments Tab
- “Disconnect” and enable No.
- Select Done.
Additional notes:
-
- Payment Types (MC, Visa, Disc, Amex) will still be available to select on the Make A Sale Screen.
- The payments info will still sync to QuickBooks so you can reconcile with your Bank Deposits.
- Typical settings are set to Undeposited Funds & Cash in Drawer
- Your settings may be different if you modified the default settings in QuickBooks POS
Disconnect Pin Pad Device
At the QuickBooks POS stations that have pin pads:
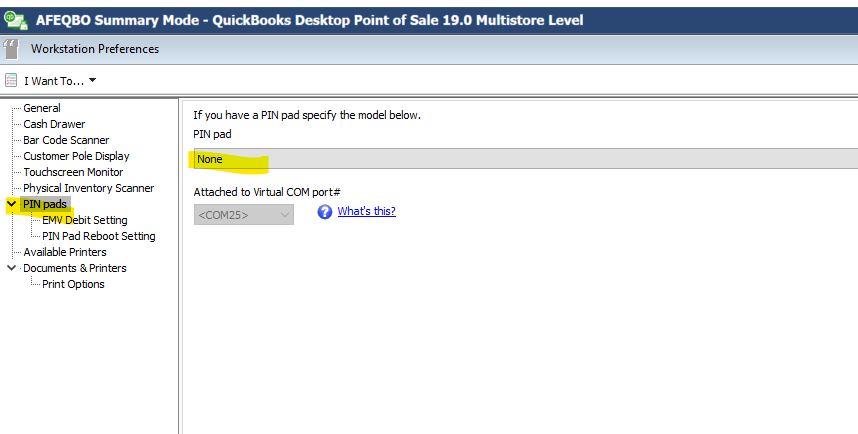
- Go to File – Preferences – Workstation
- Select PIN Pads on the left
- Select None from the drop down list.
- Select Save.
- Remove the device’s USB from the computer.
- Repeat on the other stations
Process payments for QuickBooks Point of Sale Virtually
To complete a sale with the virtual terminal with QuickBooks Payments follow this guide.
Resource: Process payments in the Merchant Service Center
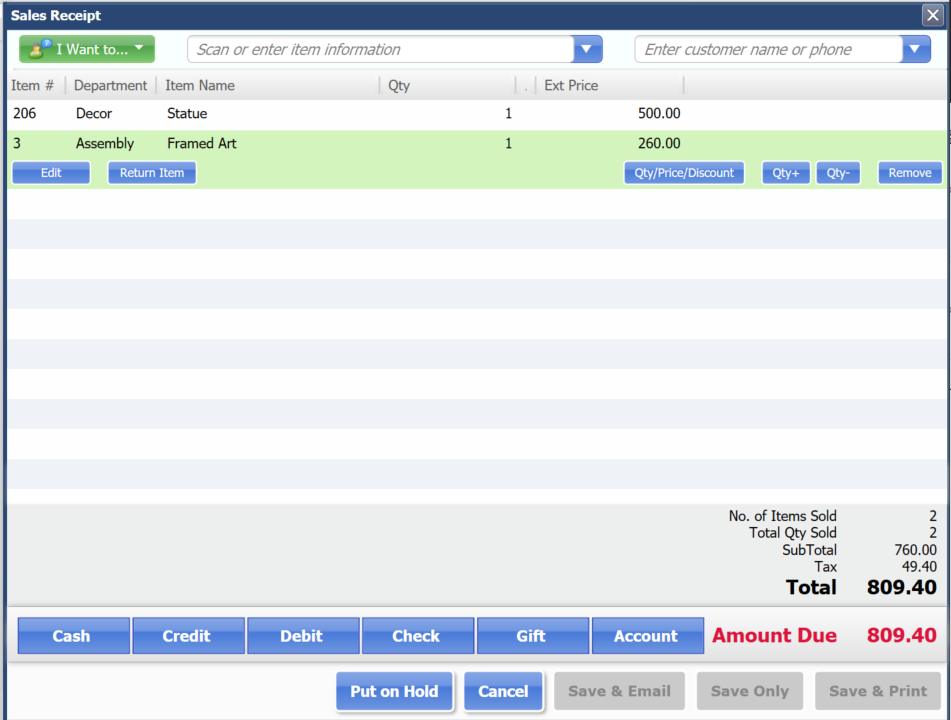
Create the sale at QuickBooks Point of Sale.
Process & Authorize the total amount from the Make a Sale screen at the Merchant Service Center.
-
- Sign in to the QuickBooks Merchant Service Center.
- Select the merchant account from the right top corner drop down.
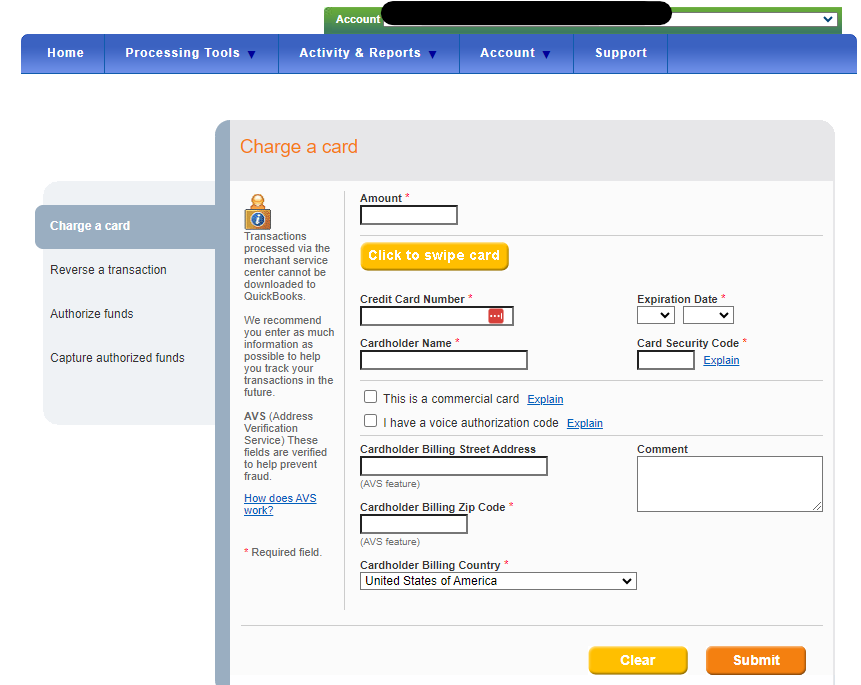
Go to Processing Tools and select Charge a Card. You will need the Zip Code.
Complete the fields & Submit.
After you process the payment, you’ll see a confirmation page. You can select Print, E-mail, Void, or Done.
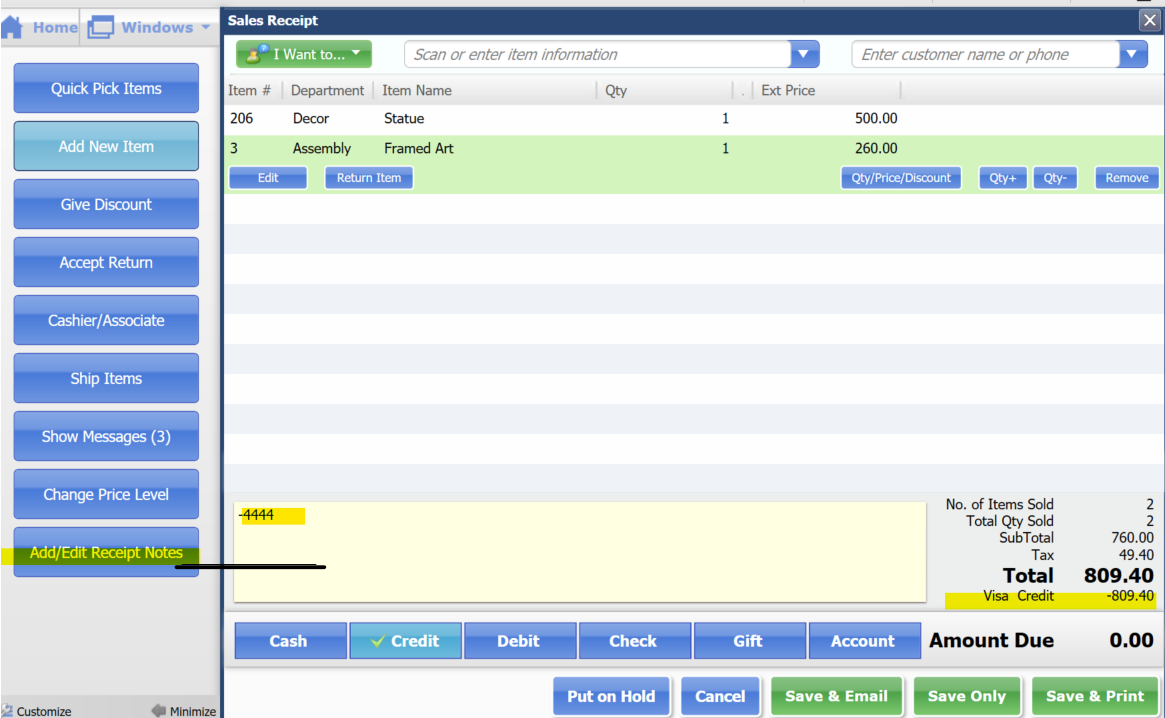
Back at QuickBooks POS, Make A Sale Screen
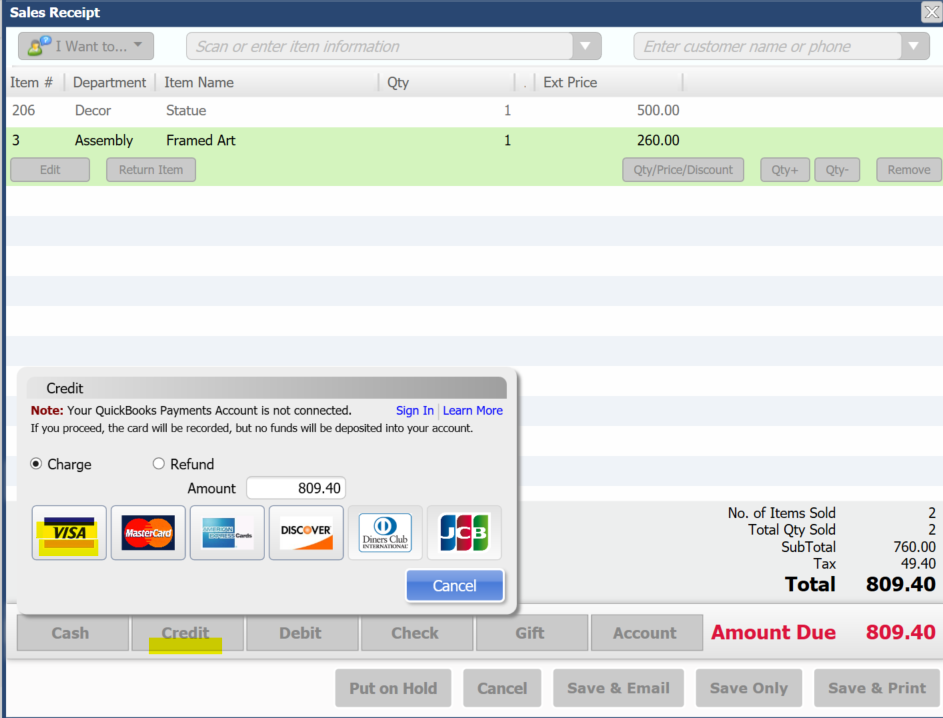
Select the Credit Card type: Visa, MasterCard, Discover, Amex.
Add a note for reference (Optional).
Select: Save & Print
When you complete the Financial Exchange, the payments will sync over to QuickBooks per usual.
Add users to your QuickBooks Merchant Account
You can add users to the merchant account center so that staff can login to run the credit cards manually.
Resource: Add users to QuickBooks Payments
- Sign in to the Merchant Service Center.
- Go to Account, then select Users and check to see if you already have an account created for your user.
- Enter the email address of the user.
- Select a user role.
- They’ll receive an invitation email to start using QuickBooks Payments. If they already have an Intuit account, they can select Sign in. Otherwise, sign up.
- Once signed in, they’ll get a link to the Merchant Service Center.


